Preparation#
Independent of the operating system you are using, we recommend you set up a VirtualBox as described in our instructions below. This ensures that the conda installation does not affect your local environment and all steps in the tutorial work as expected.
In case you still wish to install conda natively on your machine at your own risk, you can check these installation instructions.
To use conda on an HPC cluster, you need to follow the linux instructions to install conda.
Table of contents#
Preferred option: setting up a virtual machine#
Install VirtualBox#
Install the Virtual Box platform package for your operating system and the matching VM VirtualBox Extension Pack.
On MacOSX you will need to allow the kernel extension for VirtualBox in “System Preferences” -> “Security & Privacy”. At the bottom right of the “General” tab you will see a button “Allow” (clickable after unlocking the lock at the very bottom). Click this button and allow the extension from “Oracle America, Inc.”. Afterwards you need to restart your machine before VirtualBox will work.
Import Ubuntu image#
- Download
Ubuntu.ovafrom the WebDAV. - In the VirtualBox menu select “File” -> “Import Appliance…” and select the
Ubuntu.ovayou downloaded previously.
Configure shared directory#
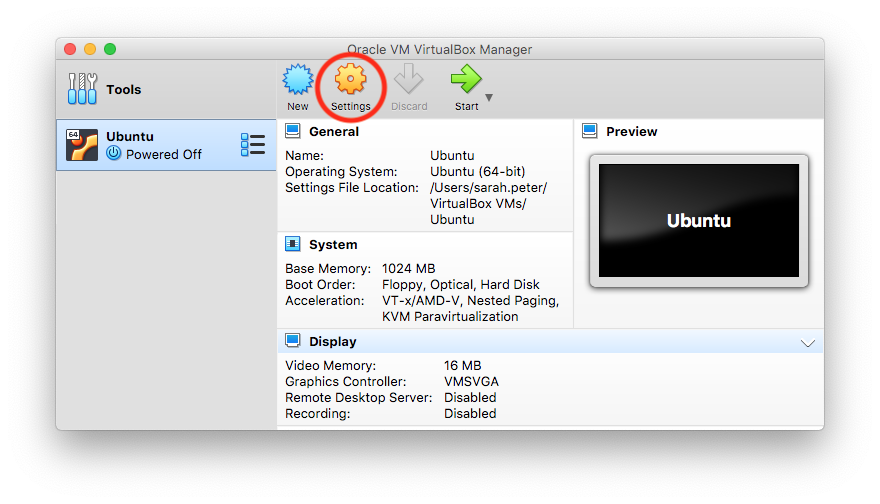
In the main windows of VirtualBox, select the Ubuntu VM and click on “Settings”.
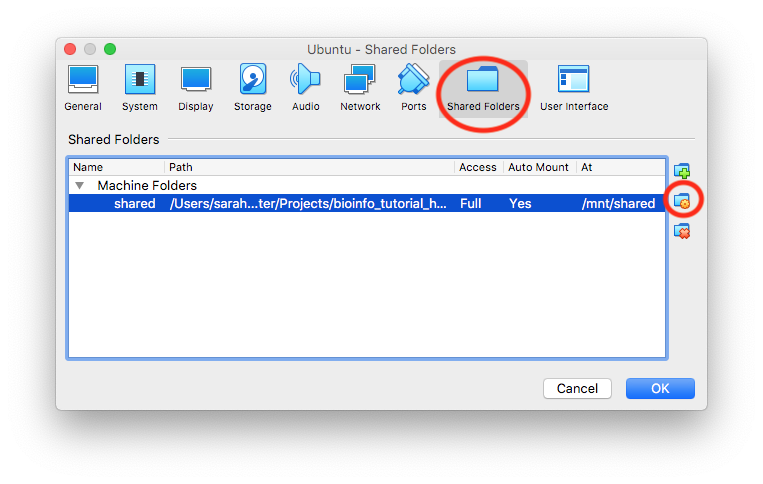
Then select the “Shared Folders” tab, select the only entry from the list and click on the edit button to the right.
In the popup window change the value for “Folder Path” to an existing appropriate folder on your machine.
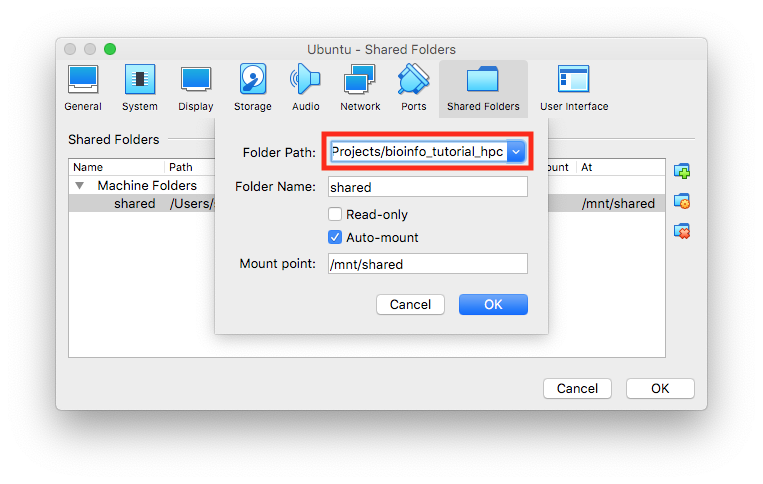
Click the “OK” button in the popup window, as well as in the “Settings” window to save the changes.
This folder will then be mounted automatically in the VM in /mnt/shared (or whatever you specify in “Mount point”). However, the mount point is only accessible as the root user inside the VM, not the regular tutorial user. To copy data there, use
sudo cp -r ~/bioinfo_tutorial/output /mnt/shared/Configure SSH access from host#
Unfortunatelty without a desktop environment copy & paste to and from the virtual machine doesn’t work. One way to solve this issue is to connect via SSH instead of using the VirtualBox window. Since VirtualBox isolates the VMs in a different subnet, we have to set up port forwarding.
First we need to know the IP of the VM:
Start the VM and log in with the username
tutorialand passwordlcsblcsb. If you have issues with the display size of the VM, try switching to “Scaled Mode” (“View” menu orCmd + c) and adjust the window size.Run
ip a s.
Look for the
enpinterface and an IP starting with10.0.2.Note down the IP you found.
Shut down the VM again by typing
shutdown -h now.
Then we can set up the port forwarding:
Go again to the “Settings” of the Ubuntu VM.
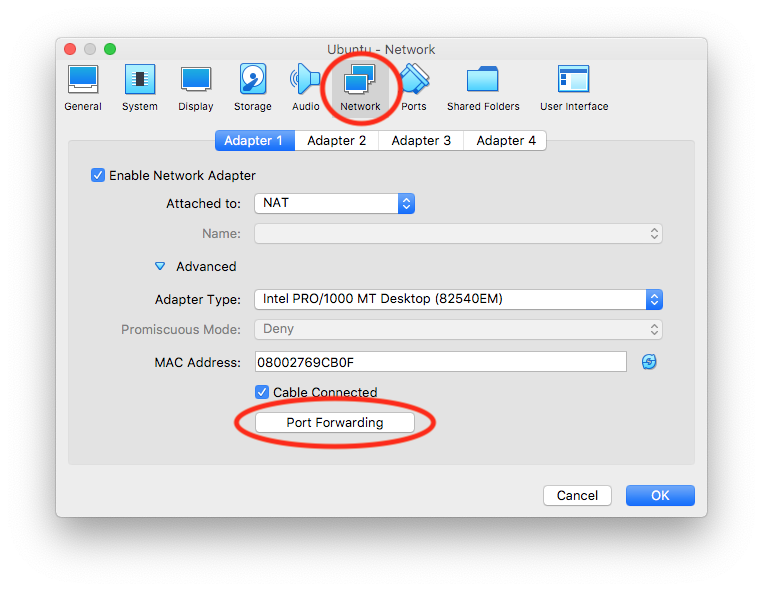
Select the “Network” tab.
Click on the little arrow in front of “Advanced” to expand the advanced settings.
Then click the button “Port Forwarding”.
In the popup window change the “Guest IP” to the IP of the VM that you noted down before.
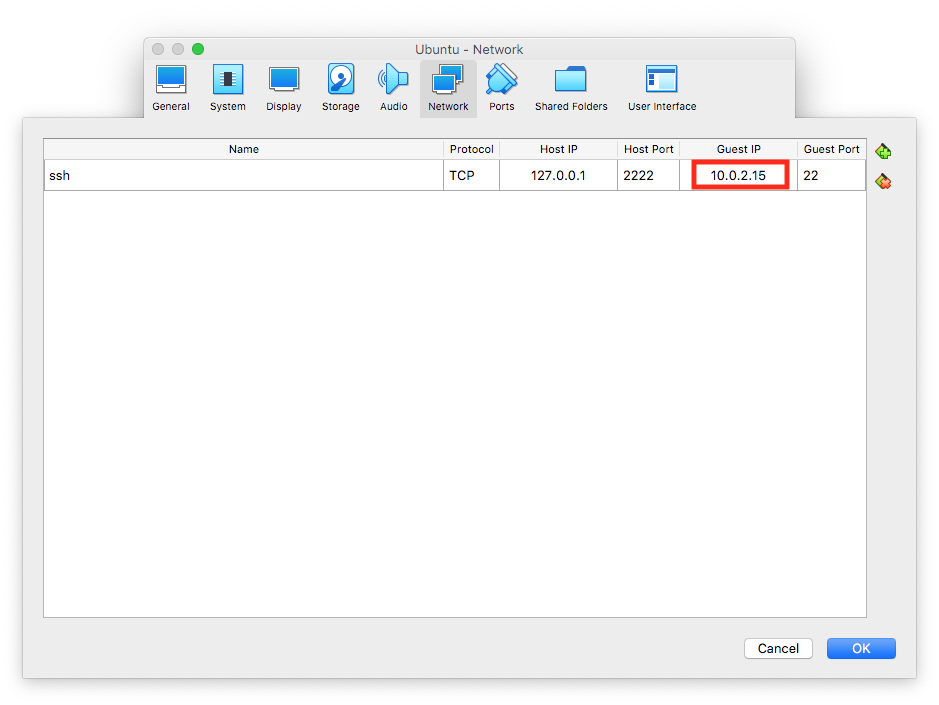
Click the “OK” button in the popup window, as well as in the “Settings” window to save the changes.
Connect to the VM via SSH#
Start the VM again in VirtualBox.
Start the
Powershell(Windows) or other terminal application (MacOS, Linux).Connect to the VM with
ssh -p 2222 tutorial@127.0.0.1Password is still
lcsblcsb. You can change it withpasswd, if you want.
Congratulations, you successfully configured the VirtualBox Ubuntu VM and connected to it via SSH! You can now follow the Linux instructions in the main tutorial.
Troubleshooting#
Windows10 Hypervisor#
Some installations of Windows 10 disable virtualization by default which leads to a VirtualBox error when opening a session on the Ubuntu host system with the Details including Not in a hypervisor partition. In this case try changing the BIOS settings as explained here.
Alternative option: Install conda natively#
Windows#
You need at least Windows 10 with the Windows 10 Fall Creator update, released October 2017.
Check that the Windows Subsytem for Linux is enabled: open “Control Panel” -> “Programs and Features” -> “Turn Windows Feature on or off” -> check “Windows Subsystem for Linux”.
Use this guide to install the Ubuntu app from the Microsoft Store.
Run the Ubuntu app and change the directory to a location that you can access from Windows:
$ cd /mnt/c/Users/<your_username>/Then follow the Linux instructions.
For older versions of Windows follow the instructions to set up VirtualBox.
MacOS#
Download and run the Miniconda .pkg installer in the Python 3.9 version.
Start the “Terminal” app or iTerm2.
If you use something else than
bashas your shell, you need run$ source ~/.bash_profileto activate conda. You can also add the conda initialization to other shells with
$ miniconda3/bin/conda init <shellname>e.g.
$ miniconda3/bin/conda init zsh
Linux#
Start the respective terminal/console app.
$ wget https://repo.anaconda.com/miniconda/Miniconda3-latest-Linux-x86_64.sh
$ chmod u+x Miniconda3-latest-Linux-x86_64.sh
$ ./Miniconda3-latest-Linux-x86_64.sh
You need to specify your installation destination, e.g. /home/<your_username>/tools/miniconda3. You must use the full path and cannot use $HOME/tools/miniconda3. Answer yes to initialize Miniconda3.
The installation will modify your .bashrc to make conda directly available after each login. To activate the changes now, run
$ source ~/.bashrcMake sure Python does not pick up packages in your home directory#
First we do a backup of the .bashrc before we modify it:
$ cp ~/.bashrc ~/.bashrc-$(date +%Y%m%d).bakThen we add export PYTHONNOUSERSITE=True :
$ cat << EOF >> ~/.bashrc

# Stop Python from picking up packages in $HOME/.local
export PYTHONNOUSERSITE=True
EOF
For the later parts of this tutorial to work, we need to make this setting permanent by adding it to .bashrc. However, make sure to delete those lines after the tutorial, so your manually installed python packages are found again.